
Installing an air purifier can significantly improve the indoor air quality of your home or office by removing pollutants, allergens, and other harmful particles from the air. Proper installation is essential to ensure optimal performance and effectiveness.
In this blog post, we will provide a comprehensive guide for air purifier installation in your HVAC system or as a standalone unit.
The Benefits of Installing an Air Purifier
Installing a purifier in your home comes with numerous benefits that can greatly improve the quality of the air you and your family breathe. One of the primary advantages is that it helps to remove harmful pollutants and allergens from the air.
These pollutants can include dust, pollen, pet dander, mold spores, and even volatile organic compounds (VOCs) that can be released from household cleaners and building materials. By reducing the presence of these pollutants, it can help alleviate symptoms of allergies and asthma, improve respiratory health, and create a healthier indoor environment.
Types of Air Purifiers to Choose From
When it comes to choosing a purifier for your home, you’ll find a wide range of options available in the market. Each type of air cleaner comes with its own set of features and benefits, so it’s important to understand the different types before making a decision.
HEPA Air Purifiers
HEPA (High-Efficiency Particulate Air) purifiers are considered to be the gold standard in air purification. They use a special filter that can capture up to 99.97% of particles as small as 0.3 microns, including dust, pollen, pet dander, and mold spores. HEPA air purifiers are highly effective in improving indoor air quality and are especially beneficial for people with allergies or asthma.
Activated Carbon Purifiers
Activated carbon purifiers are designed to remove odors, gases, and chemicals from the air. These purifiers contain a bed of activated carbon, which has a high surface area and can absorb a wide range of volatile organic compounds (VOCs) and other harmful substances. Activated carbon air purifiers are ideal for homes with cooking odors, pet smells, or tobacco smoke.
UV Air Purifiers
UV (Ultraviolet) purifiers use ultraviolet light to kill bacteria, viruses, and mold spores that pass through the purifier. These purifiers can be particularly beneficial for households with individuals who are susceptible to respiratory infections or have compromised immune systems. However, it’s important to note that UV purifiers do not remove particles like dust or pollen from the air.
Ozone Generators
Ozone generators work by producing ozone, which is a highly reactive gas that can neutralize odors and kill mold, bacteria, and viruses. While ozone can be effective in removing odors, it can also be harmful to humans and pets when present in high concentrations. Therefore, it’s essential to use ozone generators with caution and follow the manufacturer’s instructions carefully.
How To Install an Air Purifier?
Now that you understand the benefits of installing an air purifier and have chosen the right type for your home, it’s time to learn how to install air purifier. Follow these steps to ensure a smooth and successful installation process.
Choose the right location
Before installing your air purifier, consider the best location for optimal air circulation. It’s recommended to place it in a central area of the room, away from any obstructions such as furniture or curtains. Ensure that there is enough space around the unit for proper airflow.
Read the instructions
Carefully read the manufacturer’s instructions that come with your purifier. Each model may have specific installation requirements, so it’s important to follow the instructions provided.
Prepare the area
Before installation, clean the area where you plan to place it. Remove any dust or debris to prevent it from interfering with the unit’s performance.
Install filters if necessary
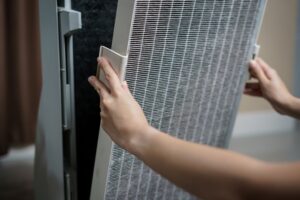
Some air purifiers require the installation of filters. Follow the manufacturer’s instructions to properly install the filters in the designated slots.
Connect to the power source
Depending on the type of air cleaner, you may need to plug it into a power outlet or connect it to your HVAC system. Follow the manufacturer’s instructions to ensure a safe and secure connection.
Turn on the air purifier
Once properly installed, turn on the air purifier and adjust the settings according to your preferences. Monitor the unit to ensure it is functioning properly.
How to Properly Install Air Purifiers in HVAC System?
To install air purifiers in HVAC systems, start by turning off the HVAC unit. Locate a suitable section for installation within the ductwork, preferably near the air handler. Cut an opening and secure the purifier using brackets. Connect the power supply to the unit, ensuring compatibility with your HVAC’s voltage. Attach the purifier’s control panel to a convenient location.
Finally, seal any gaps around the unit to prevent air leakage. After installation, regularly maintain and replace filters. Professional installation may be recommended for complex systems. This integration enhances overall indoor air quality, providing filtered and purified air throughout your space.
Air Purifier Maintenance Tips
After installing your air cleaner, it’s important to properly maintain it to ensure that it continues to work effectively and efficiently. Regular maintenance will help prolong the lifespan of your air cleaner and maximize its benefits for you and your family. Here are some maintenance tips to keep in mind.
Regularly clean or replace filters
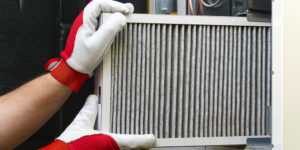
The filters in your purifier are responsible for capturing and trapping pollutants in the air. Over time, these filters can become clogged with dust and debris, reducing their effectiveness. Refer to the manufacturer’s instructions on how often to clean or replace the filters.
Clean the exterior of the unit
Dust and dirt can accumulate on the exterior of your air purifier, which can affect its overall performance. Use a soft cloth or a brush to gently clean the exterior surfaces. Avoid using harsh cleaning agents or abrasive materials, as they can damage the unit.
Check for any damage or leaks
Regularly inspect your air purifier for any signs of damage or leaks. Check the power cord, plug, and any connections to ensure they are in good condition. If you notice any cracks, tears, or leaks, contact the manufacturer for guidance on repairs or replacements. It’s important to address any damage promptly to prevent further issues and maintain the performance of your purifier.
Air Cleaner Repair
Air purifier repair involves several steps. Begin by identifying the issue, such as a malfunctioning fan, sensor, or electrical component. Turn off the unit and disconnect the power. Inspect and clean filters, removing any dirt or debris.
Check wiring and connections for damage. Replace faulty parts with compatible replacements. Ensure proper reassembly and secure all components. Power on the air cleaner and test its functionality. If repairs are complex, consider professional assistance.